C'est l'hiver ! 
Armoire électronique Fablab : Différence entre versions
(Page créée avec « Vous trouverez sur cette page l'ensemble du matériel disponible dans l'armoire électronique du Fablab. == --> '''Ruban de led RGB'''== Lien vers page Wiki pour trouver... ») |
|||
| (2 révisions intermédiaires par un autre utilisateur non affichées) | |||
| Ligne 52 : | Ligne 52 : | ||
| − | == --> '''Esp 32''' == | + | == --> '''Esp 32''' == |
Lien vers page Wiki contenant le code minimal : | Lien vers page Wiki contenant le code minimal : | ||
https://www.wikidebrouillard.org/wiki/Configurez_le_r%C3%A9seau_Wifi_sur_un_ESP | https://www.wikidebrouillard.org/wiki/Configurez_le_r%C3%A9seau_Wifi_sur_un_ESP | ||
| − | |||
== --> '''Servo moteur''' == | == --> '''Servo moteur''' == | ||
| Ligne 109 : | Ligne 108 : | ||
== --> '''Capteur de distance à ultrason''' == | == --> '''Capteur de distance à ultrason''' == | ||
| − | Lien vers la page Wiki pour récupérer Code minimal : | + | Lien vers la page Wiki pour récupérer Code minimal : |
[https://www.wikidebrouillard.org/wiki/Piano_invisible_avec_arduino https://www.wikidebrouillard.org/wiki/Piano_invisible_avec_arduino ] | [https://www.wikidebrouillard.org/wiki/Piano_invisible_avec_arduino https://www.wikidebrouillard.org/wiki/Piano_invisible_avec_arduino ] | ||
| − | |||
== --> '''Vibreur''' == | == --> '''Vibreur''' == | ||
| Ligne 133 : | Ligne 131 : | ||
} | } | ||
</syntaxhighlight> | </syntaxhighlight> | ||
| + | |||
| + | ==Et aussi== | ||
| + | ===Actionneurs=== | ||
| + | <gallery> | ||
| + | Fichier:Vibreur.png|Vibreur | ||
| + | Fichier:Solenoide.png|Solenoïde | ||
| + | Fichier:Rubans-led-ws2812b.jpg|Ruban de led adressable | ||
| + | Fichier:PiezoPassif.jpg|Piezo Actif | ||
| + | Fichier:PiezoActif.png|Piezo Passif | ||
| + | Fichier:MatriceLED8X8.png|Matrice de LED 8X8 | ||
| + | Fichier:LEDRGB.jpg|Led RGB | ||
| + | Fichier:LED.png|LED | ||
| + | Fichier:IDFPlayer Lecteur MP3.jpg|Lecteur Mp3 | ||
| + | Fichier:CaretmicroSD.jpg|Carte MicroSD | ||
| + | Fichier:AnneaudeLED.png| Anneau de Led adressables | ||
| + | Fichier:EcranOled.png|Ecran Oled | ||
| + | Fichier:HautParleur.png|Haut-PArleur | ||
| + | Fichier:MoteurPASaPAS.png|Moteur pas à pas | ||
| + | Fichier:Servomoteurbeau.png| Servomoteur | ||
| + | </gallery> | ||
| + | |||
| + | ===Capteurs=== | ||
| + | <gallery> | ||
| + | Fichier:MicrophoneArduino.png|Microphone Arduino inmp441 | ||
| + | Fichier:HCSR04.png|HCSR04 - capteur de distance | ||
| + | Fichier:CapteurHumidite.png|Capteur d'humidité | ||
| + | Fichier:Capteurgyroscopique.png|Gyroscope | ||
| + | Fichier:CapteurEffetHall.png|Capteur à effet Hall | ||
| + | Fichier:Potentiometregros.png| Potentiomètre | ||
| + | Fichier:BoutonPoussoir.png | Bouton poussoir | ||
| + | Fichier:Boutonpoussoirarcade.png| Bouton poussoir Arcade | ||
| + | Fichier:DTH11-DHT22.png| capteur d'humidité et de température DHT11 DHT22 | ||
| + | </gallery> | ||
Version actuelle datée du 14 janvier 2026 à 11:58
Vous trouverez sur cette page l'ensemble du matériel disponible dans l'armoire électronique du Fablab.
Sommaire
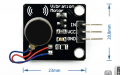
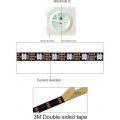
--> Ruban de led RGB
Lien vers page Wiki pour trouver le code minimal :
https://www.wikidebrouillard.org/wiki/Item:Ruban_de_Led_-_WS2812B
--> Haut parleur
Lien vers page Wiki : https://www.wikidebrouillard.org/wiki/Item:Haut_parleur
Code minimal :
 1 const int speakerPin = 9;  // Broche connectée au haut-parleur
 2
 3 void setup() {
 4   pinMode(speakerPin, OUTPUT);  // Définit la broche comme sortie
 5 }
 6
 7 void loop() {
 8   tone(speakerPin, 1000);  // Émet un son de 1000 Hz (1 kHz)
 9   delay(1000);             // Attend 1 seconde
10   noTone(speakerPin);      // Arrête le son
11   delay(1000);             // Attend 1 seconde
12 }
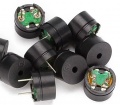
--> Piezo passif
Code minimal :
 1 const int piezoPin = 8;  // Pin connectée au piezo
 2
 3 void setup() {
 4   pinMode(piezoPin, OUTPUT);  // Définit la broche comme sortie
 5 }
 6
 7 void loop() {
 8   tone(piezoPin, 1000);  // Génère un son à 1000 Hz (1 kHz)
 9   delay(500);            // Attend 500 ms
10   noTone(piezoPin);      // Arrête le son
11   delay(500);            // Attend 500 ms
12 }
--> Esp 32
Lien vers page Wiki contenant le code minimal :
https://www.wikidebrouillard.org/wiki/Configurez_le_r%C3%A9seau_Wifi_sur_un_ESP
--> Servo moteur
Lien vers page Wiki pour récupérer le Code minimal :
https://www.wikidebrouillard.org/wiki/Item:Servomoteur
--> Servo rotation continue
Lien vers page Wiki pour récupérer le Code minimal :
https://www.wikidebrouillard.org/wiki/Item:Micro-servo_%C3%A0_rotation_continue
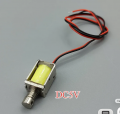
--> Moteur DC 3V
Code minimal :
 1 const int motorPin = 9;  // Broche connectée à la base du transistor (via résistance)
 2
 3 void setup() {
 4   pinMode(motorPin, OUTPUT);  // Définit la broche comme sortie
 5 }
 6
 7 void loop() {
 8   digitalWrite(motorPin, HIGH);  // Allume le moteur
 9   delay(2000);                   // Attend 2 secondes
10   digitalWrite(motorPin, LOW);   // Éteint le moteur
11   delay(2000);                   // Attend 2 secondes
12 }
--> Led
Lien vers la page Wiki pour récupérer Code minimal :
https://www.wikidebrouillard.org/wiki/Item:LED
--> Potentiomètre rotatif
Lien vers la page Wiki pour récupérer Code minimal :
https://www.wikidebrouillard.org/wiki/Item:Potentiom%C3%A8tre
--> Capteur de distance à ultrason
Lien vers la page Wiki pour récupérer Code minimal :
https://www.wikidebrouillard.org/wiki/Piano_invisible_avec_arduino
--> Vibreur
Code Minimal :
 1 const int vibMotorPin = 9;  // Broche connectée à la base du transistor
 2
 3 void setup() {
 4   pinMode(vibMotorPin, OUTPUT);  // Définit la broche comme sortie
 5 }
 6
 7 void loop() {
 8   digitalWrite(vibMotorPin, HIGH);  // Allume le vibreur
 9   delay(500);                       // Vibre pendant 500 ms
10   digitalWrite(vibMotorPin, LOW);   // Éteint le vibreur
11   delay(1000);                      // Pause pendant 1 seconde
12 }
Et aussi
Actionneurs
Vibreur
Solenoïde
Ruban de led adressable
Piezo Actif
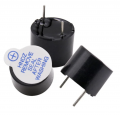
Piezo Passif
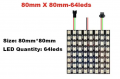
Matrice de LED 8X8
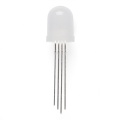
Led RGB
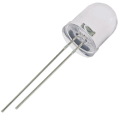
LED
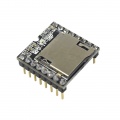
Lecteur Mp3
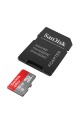
Carte MicroSD

Anneau de Led adressables
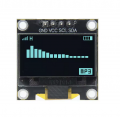
Ecran Oled
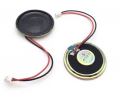
Haut-PArleur
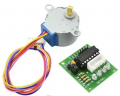
Moteur pas à pas
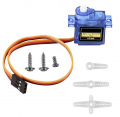
Servomoteur


Capteurs
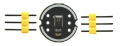
Microphone Arduino inmp441
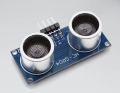
HCSR04 - capteur de distance
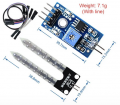
Capteur d'humidité

Gyroscope
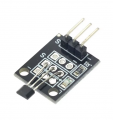
Capteur à effet Hall
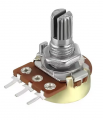
Potentiomètre
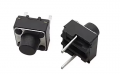
Bouton poussoir
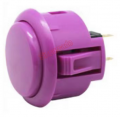
Bouton poussoir Arcade

capteur d'humidité et de température DHT11 DHT22


